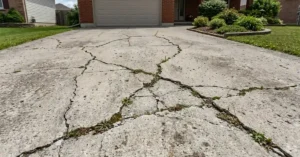
Driveways face heavy use, tough weather, and gradual deterioration as time goes on Cracks, stains, and surface damage can make your driveway look old and worn out. The good news is that concrete driveway resurfacing is an affordable and effective way to give your driveway a fresh, clean look without the cost of a full replacement.
In this guide, you’ll learn what concrete driveway resurfacing is, how it works, what tools and materials you need, and step-by-step instructions to help you tackle this project yourself or decide if it’s better to hire a professional.
What Is Concrete Driveway Resurfacing?
The process of concrete driveway resurfacing adds a smooth, durable layer over your old driveway surface. Instead of tearing out and replacing the entire slab, resurfacing restores the surface and covers minor cracks and imperfections. It’s a cost-effective way to handle driveway repair and extend the life of your driveway by many years.
Driveway resurfacing works best for concrete driveways that show cosmetic flaws but remain structurally stable. If your driveway has large cracks, deep potholes, or major foundation issues, a full replacement may be needed instead.
Benefits of Resurfacing a Concrete Driveway
Before we dive into the how-to, let’s look at why concrete driveway resurfacing is such a popular option:
- Cost Savings: Resurfacing costs much less than pouring a brand-new driveway.
- Quick Process: Most resurfacing projects take only a day or two.
- Curb Appeal: A freshly resurfaced driveway looks like new and can even boost your home’s value.
- Customization: You can add decorative finishes, colors, or patterns for a unique look.
- Eco-Friendly: Resurfacing uses less material and creates less waste than full replacement.
When Should You Resurface Your Driveway?
Resurfacing is best for driveways with:
- Small cracks or surface pitting
- Minor discoloration or stains
- A generally solid base with no major structural damage
If you’re unsure whether resurfacing is the best option, consult a professional concrete repair to inspect your driveway’s condition.
Tools and Materials Needed
Before starting your DIY driveway resurfacing, gather these supplies:
- Concrete resurfacer mix
- Pressure washer
- Concrete cleaner/degreaser
- Crack filler or patching compound
- Mixing bucket and drill with paddle attachment
- Squeegee, trowel, and broom
- Protective gear (gloves, safety glasses, mask)
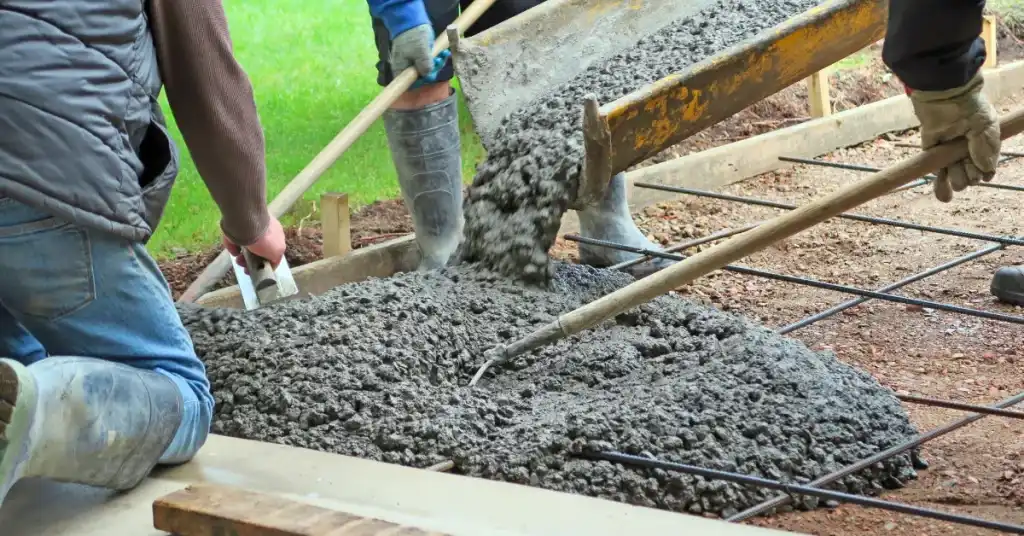
Step-by-Step Guide to Resurfacing Your Concrete Driveway
Ready to give your driveway a new life? Here’s how to do concrete driveway resurfacing step by step:
1. Clean the Driveway Thoroughly
First, get rid of dirt, debris, oil stains, and crumbling concrete. A pressure washer combined with a concrete cleaner will give you the cleanest surface. Use a pressure washer and concrete cleaner for best results. A clean surface helps the new overlay bond properly.
2. Repair Cracks and Holes
Inspect your driveway for cracks and holes. Use a concrete crack filler or patching compound to fix any damage. Smooth the repairs with a trowel and let them cure according to the product instructions.
3. Mix the Resurfacer
Follow the manufacturer’s instructions to mix the concrete resurfacing compound. Use a drill with a mixing paddle to ensure a smooth, lump-free consistency.
4. Apply the Resurfacer
Start resurfacing from one end and move along the driveway section by section. Pour the resurfacer onto the concrete and spread it evenly using a long-handled squeegee. Work quickly, as the mixture can set fast.
5. Add Texture
To avoid a slick surface, gently drag a broom over the wet resurfacer. This creates a slip-resistant texture and gives your driveway a professional finish.
6. Let It Cure
Keep vehicles and foot traffic off the driveway for at least 24 to 48 hours, following product directions and weather conditions. Proper curing ensures your concrete driveway resurfacing lasts for years.
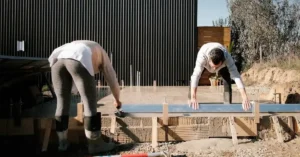
DIY vs. Hiring a Professional
If you’re handy and comfortable working with concrete, a DIY driveway resurfacing project can save you money. However, resurfacing requires proper preparation and timing, so mistakes can lead to poor results or a resurfacer that doesn’t bond well.
Hiring a concrete resurfacing contractor ensures professional results and often comes with a warranty. If your driveway has significant damage, complex patterns, or if you want decorative finishes, hiring a pro is the better option.

Tips for Long-Lasting Results
Here are a few extra tips to make your concrete driveway resurfacing last:
Keep your driveway clean and free of debris.
Seal the surface every few years to protect it from stains and weather damage.
Repair small cracks immediately to prevent bigger issues.
Avoid using harsh chemicals that can break down the concrete.
FAQs
What is concrete driveway resurfacing and when should it be done?
Concrete driveway resurfacing involves applying a smooth, durable layer over an existing driveway to cover minor cracks and imperfections. It’s ideal for driveways with cosmetic flaws but a structurally stable base.What are the benefits of resurfacing a concrete driveway?
Resurfacing saves money compared to full replacement, is quick to complete, improves curb appeal, allows decorative customization, and is more eco-friendly by using less material and producing less waste.What tools and materials are needed for driveway resurfacing?
Essential supplies include concrete resurfacer mix, pressure washer, concrete cleaner/degreaser, crack filler, mixing bucket and drill, squeegee, trowel, broom, and protective gear such as gloves and safety glasses.Can I resurface my driveway myself or should I hire a professional?
DIY resurfacing is possible for those comfortable with concrete work, but proper preparation is critical. Hiring a professional ensures a long-lasting finish, warranty, and is recommended for driveways with significant damage or decorative finishes.How can I maintain a resurfaced concrete driveway for long-lasting results?
Keep the driveway clean, seal it every few years, repair small cracks promptly, and avoid harsh chemicals that could damage the surface to maintain a smooth, durable finish.
Final Thoughts
Concrete driveway resurfacing is an excellent way to renew your driveway’s look, boost your home’s curb appeal, and save money compared to a full replacement. With the right supplies and a well-thought-out plan, you can refresh your driveway over a weekend and restore its like-new appearance.
Whether you choose DIY driveway resurfacing or hire a professional, you’ll love the fresh, clean finish and added value it brings to your home. So don’t wait—give your driveway the facelift it deserves today!